Facebook login with GraphQL and Passport
Implementing a proper authentication system can be very challenging especially if you save user credentials in your own database. You need to handle this confidential data with great care by encrypting and storing passwords securely. And still, you might introduce vulnerabilities which expose valuable data. Therefore offering social logins for example via Facebook saves you a lot of effort and provides an easy and secure way to authenticate to your users.
Implementing social login is fairly simple especially if you use established libraries like Passport.js. But it might still be confusing how to combine these with a new technology like GraphQL. This is what we will cover in this article.
The code in this article is based on a GraphQL server we implemented in a previous introductory post. You don't need to read that post to follow this article. But if you have trouble understanding or want the bigger picture you can have a look there.
As a starting point, the server already supports a query to fetch the logged in user's data and a mutation to log out. It's also set up to use Passport and express-session. You can find the code on GitHub and add the code snippets in this article as you follow along.
Creating a Facebook application
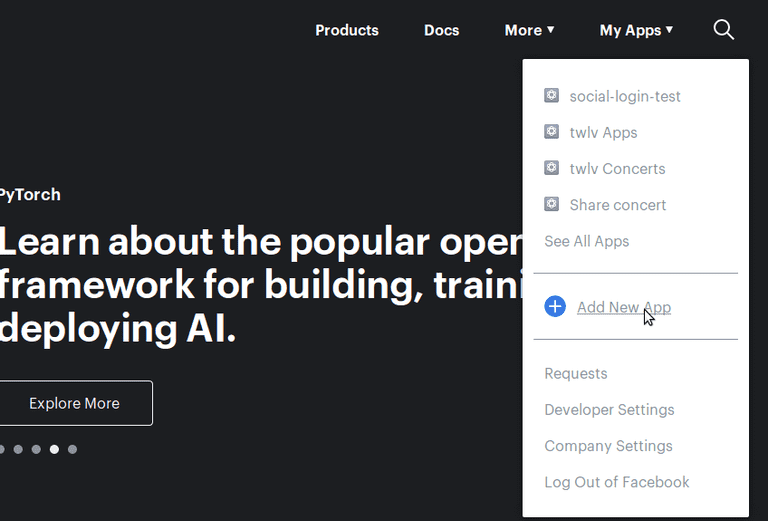
Before we start coding we need to register our application on Facebook. This is very simple and only takes a couple of clicks. Go to the Facebook developers page and log in with your Facebook account. Then click on My Apps in the top menu. Here you should find a Create App button.

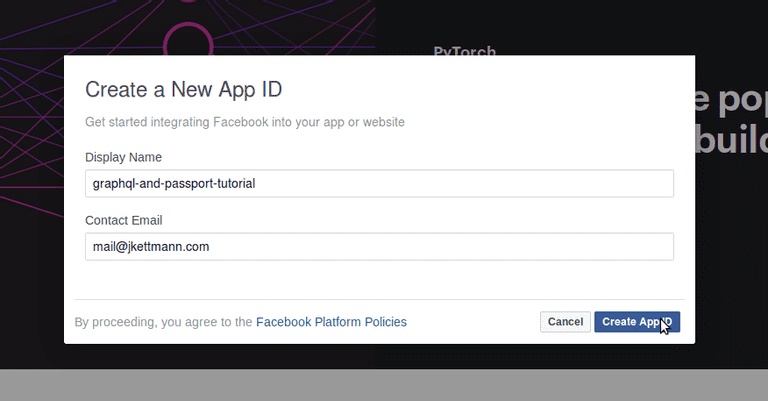
This should open a dialog that asks you for a name and email address to contact you.

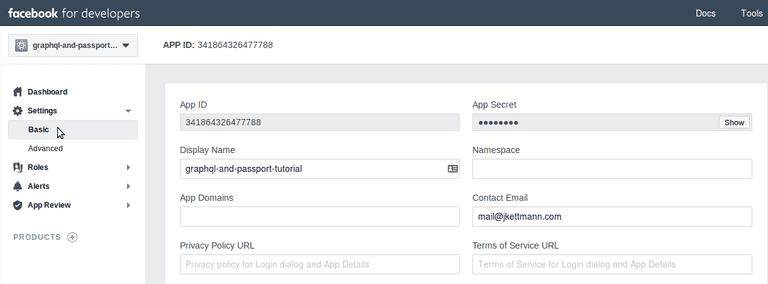
Once you created the app you will be redirected to its dashboard. On the left, you can find the Settings drawer. Click on Basic and you will be sent to a page where you can see your app's ID and secret. You will need those later in this article.

How does authentication with Facebook and Passport work?
Facebook provides an OAuth 2.0 API which Passport uses to authenticate a user. This is how it works:
- Inside a browser a user opens an endpoint on your server (let's say https://your-domain.com/auth/facebook) which passport is listening to.
- Passport redirects the user to an URL on facebook.com for authentication. It includes some parameters in this URL like the OAuth response type it's expecting (response_type=code), a redirect URI that Facebook sends the user back to, the data that you want to receive from the user's Facebook profile (scope=email) and your apps client ID.
- The user is asked to log in with her Facebook account and authorize your app to have access to her profile.
- When the user confirms she will be redirected to the provided redirect URI. Facebook appends an authentication code to the URL.
- Finally, Passport uses this authentication code and your app's client secret to fetch the actual user data and an access token from the Facebook API.
You can see that this flow is quite complicated. Thankfully Passport provides all the functionality to take care of this via its strategies.
Adding Passport's Facebook strategy to the GraphQL server
To authenticate with a Facebook account Passport.js has a Facebook strategy. This will handle the complete OAuth 2.0 flow which can be complicated to implement yourself as you saw above. Let's start by installing it to our dependencies.
npm install passport-facebook
Now we need to tell Passport to use this strategy.
api/index.js
import FacebookStrategy from 'passport-facebook';...const facebookOptions = ...const facebookCallback = ...passport.use(new FacebookStrategy(facebookOptions,facebookCallback,));...
The FacebookStrategy requires two parameters. First, some options which need to contain your Facebook app's clientID and clientSecret, the callback URL that Facebook will redirect to after a successful login and an array of profileFields that defines the user profile data we want to receive.
const facebookOptions = {clientID: YOUR_FACEBOOK_CLIENT_ID,clientSecret: YOUR_FACEBOOK_APP_SECRET,callbackURL: 'http://localhost:4000/auth/facebook/callback',profileFields: ['id', 'email', 'first_name', 'last_name'],};
In a production setup, you shouldn't hardcode the client ID and secret in the code for security reasons. Rather use environment variables and a package like dotenv.
The second parameter is a callback that will be executed when Facebook redirects to the above-defined callback URL. Inside this callback, we try to find a user that matches the Facebook profile's id. If there is no such user we add a new one with the received profile data to our existing list of users.
const facebookCallback = (accessToken, refreshToken, profile, done) => {const users = User.getUsers();const matchingUser = users.find(user => user.facebookId === profile.id);if (matchingUser) {done(null, matchingUser);return;}const newUser = {id: uuid(),facebookId: profile.id,firstName: profile.name.givenName,lastName: profile.name.familyName,email: profile.emails && profile.emails[0] && profile.emails[0].value,};users.push(newUser);done(null, newUser);};
Finally, we define two routes on the server inside api/index.js.
const app = express();...app.get('/auth/facebook', passport.authenticate('facebook', { scope: ['email'] }));app.get('/auth/facebook/callback', passport.authenticate('facebook', {successRedirect: 'http://localhost:4000/graphql',failureRedirect: 'http://localhost:4000/graphql',}));
The first one /auth/facebook redirects the user to the Facebook login page. Since we want to receive the user email we add it to the scope. It's honestly a bit confusing since we defined it already in the profile fields but this is how it works. There is even an open issue in passport-facebook regarding this.
After the user logged in Facebook redirects the browser to the second route /auth/facebook/callback. Passport automatically does its magic, gets the user's data from Facebook and creates a session cookie since we use express-session. Afterward, the user is redirected to the Apollo playground. Run the app with npm start and try it out yourself.
Since the session is persisted in the cookie you can now send the current user query to the GraphQL API and voila you can see your Facebook profile's data in the response.
{currentUser {idfirstNamelastName}}
You can log out via sending the mutation below.
mutation {logout}
I hope you enjoyed this article. If you're wondering how to implement password-based authentication with Passport and GraphQL have a look at this post as well.